This is the 5th and final part of a series of posts to show how you can develop PySpark applications for Databricks with Databricks-Connect and Azure DevOps. All source code can be found here.
Configuration & Releasing
We are now ready to deploy. I’m working on the assumption we have two further environments to deploy into - UAT and Production.
Deploy.ps1
This script in the root folder will do all the work we need to release our Wheel and setup some Databricks Jobs for us. You do not need to use Jobs - you can use Azure Data Factory instead if you prefer, the passing of parameters is identical to this method.
The deploy script makes use of our azure.databricks.cicd.tools which I highly recommend you take a play with if you haven’t already.
You can execute this script from your local computer assuming you have built the Wheel and executed the Build.ps1 scripts first. You should note that if you do this the version on the Wheel will remain as 0.0.1 - if you deploy for a second time you MUST restart the cluster in order for it to pickup the new version.
Azure DevOps Release Pipeline
We can now create a Release to pickup our build artefacts. Again this is public and can be viewed here. The overall pipeline looks like this:
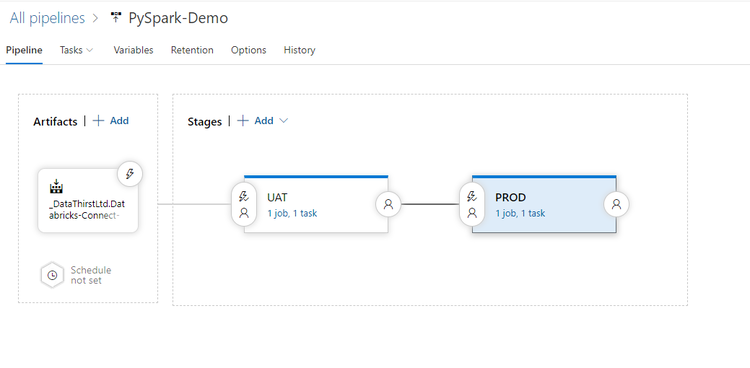
Here I have created the two environments, and set the artefacts to be the output of our CI build. I have also created two variables named DatabricksToken and ClusterId which can vary for each environment.
The task for each stage is identical and looks like this:
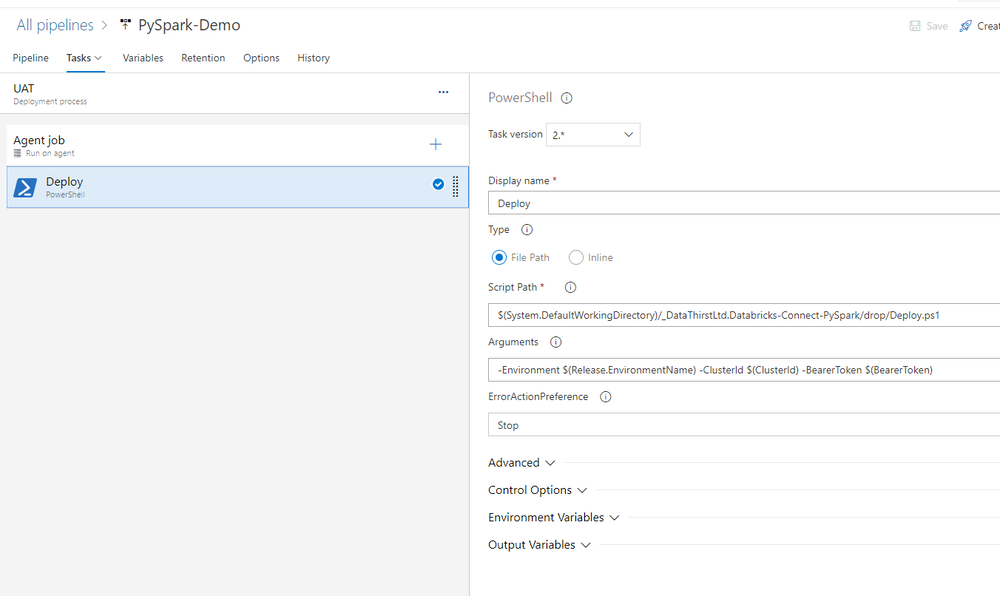
I have selected the Deploy.ps1 script and set the parameters to pass in my variables.
I can now run the deployment and check the results.
Validation
Firstly we can check the files have deployed to DBFS correctly using a notebook:
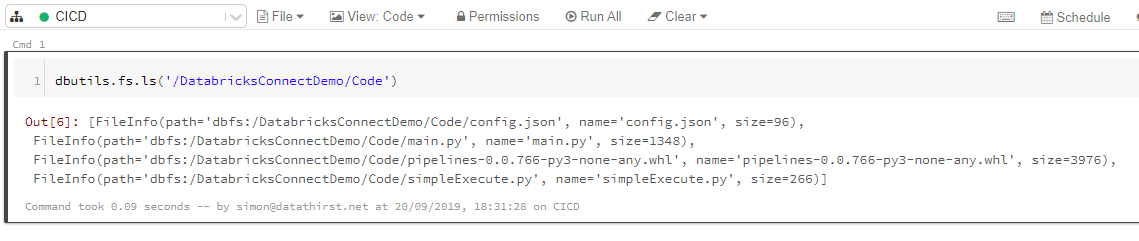
Notice that the BuildId has been inject into the filename for the Wheel. Our config file has been deployed which we can validate is for UAT by running this command:
dbutils.fs.head('/DatabricksConnectDemo/Code/config.json')
And lastly we should be able to see (and execute) our Jobs in the Jobs screen, again notice the BuildId in the Library reference of Job:
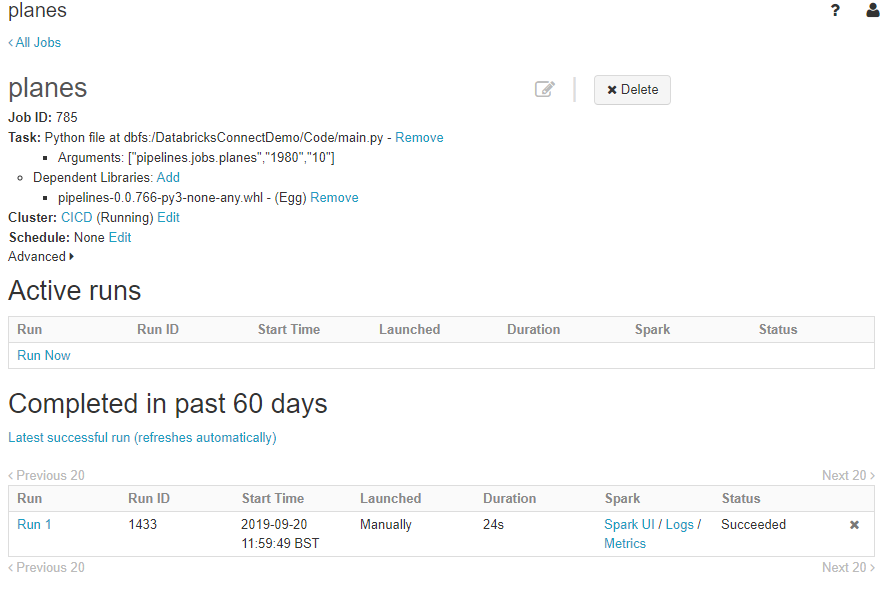
Also note how the arguments are passed - ADF works in the same way.
Lastly
You can also use your library in notebooks. For example, this code will display the version of the current code:
dbutils.library.restartPython()
import pipelines
print(pipelines.__version__)```
And you can execute the pipelines directly:
```from pipelines.jobs import amazon
amazon.etl()```
Both of those gives these outputs:

That’s it - I hope you found this useful.
[Back to Series](/blog/2019/9/20/series-developing-a-pyspark-application)